Air Conditioning Repair: Common Problems That Can Lead to Costly Breakdowns

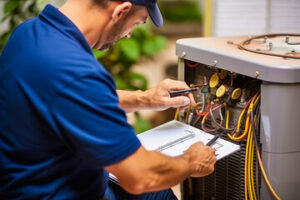
During an air conditioning maintenance visit, your service technician will inspect equipment and clean system components. In many cases, he or she will also be able to make minor repairs as part of your service call.

Air Conditioning Repair

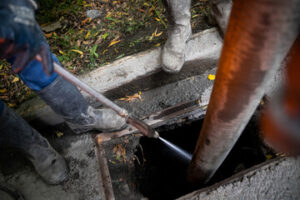
However, some AC repair tasks like replacing motors or sealing refrigerant leaks require years of training and specialized tools. Contact Air Conditioning Repair Loveland OH for professional help.

The evaporator coil absorbs heat from your living spaces and transfers it to the air that circulates through your home. This is a critical function, but the slightest dust or debris on your evaporator coil can interfere with this process. As a result, the AC will run for longer cycles before it produces the desired level of cooling. This can wear out the system and lead to a host of problems.

If the evaporator coil is dirty, it can also prevent the AC from dehumidifying the home. The dirt acts as an insulator, preventing heat transfer to the air. Eventually, the coil can freeze over, which prevents the AC from cooling and causes it to turn off entirely.

Dirty evaporator coils can also result in unpleasant odors in the home. This is because odor-producing chemicals from cleaning products, paints and furnishings can accumulate on the coil and be blown into the living spaces during operation. This can aggravate allergies and respiratory issues for those in the home.

Keeping the coil clean can prevent these and other problems from occurring. You can do a simple DIY cleaning job by turning off power to the unit, removing the plenum and coil compartment doors and spraying the coil inside and out with a self-rinsing foaming coil cleaner. Be sure to close the doors before re-installing them. You should also minimize dirt and debris accumulation near the unit by cleaning the area around it, removing leaves and debris and trimming shrubs and trees.

You should also avoid contaminating the coil with water. You can do this by ensuring that the drain channels are clear and free of blockages. These channels help the coil to drain excess moisture that can discolor walls and carpets. You should also comb the aluminum fins on the evaporator coil with a tool called a fin comb to ensure they are not bent, which can interfere with the air flow and reduce efficiency.

If you are not comfortable performing a DIY coil cleaning, you can ask a professional to perform it. They can access the evaporator coil by turning off power to the unit, locating it and then removing the foil-wrapped insulation that covers it.

Dirty Compressor Coils

Dirty compressor coils can cause a wide range of problems. The most common is ineffective cooling, as dirty coils prevent your system from absorbing and dumping heat as it should. This causes your AC to run longer and harder to get the job done, which can eventually lead to damage to the unit or air quality issues.

The good news is that you can often prevent this problem by cleaning your condenser coil on a regular basis. Just make sure that the power supply to your outdoor unit is turned off before you start. Use a soft-bristle brush or a special coil cleaner to remove dirt and debris from the coil fins. Be sure to follow the manufacturer’s instructions regarding application and contact time. Finally, clear away any plants, bushes or other items that may be located near the unit and blocking the airflow.

Another sign of a dirty coil is an unexplained increase in your electricity bill. Your air conditioner will need to run longer to meet your cooling needs when the coils are clogged, which will cause your energy bill to spike. Additionally, dirty AC coils can impact your home’s energy efficiency rating, which could ultimately affect your ability to sell your house in the future.

Both evaporator and compressor coils can be cleaned on your own, but it’s important to have a professional perform regular maintenance services as well. An experienced technician can perform a comprehensive inspection of your unit and clean the coils thoroughly to prevent any serious issues down the road. They’ll also ensure that the airflow is free from obstruction and that there are no signs of a blockage in the refrigerant line. In addition, a professional will be able to spot any other potential issues and fix them before they have a chance to cause additional damage. For the best results, schedule regular maintenance services with a qualified service technician today. They’ll have the tools and expertise to clean both evaporator and compressor coils quickly, safely and effectively. They can also perform a thorough inspection of the unit to identify any potential problems and recommend repairs if necessary.

Low Coolant Levels

If your air conditioning system is not cooling the way it should, you may have low refrigerant levels. The system operates by circulating this pressurized refrigerant, commonly known as Freon, throughout the system to facilitate heat exchange. Leaks and other problems can cause the amount of refrigerant to decrease. Low refrigerant causes the system to work harder, which can damage the system and cause a costly breakdown.

The cooling system on your car has a sensor that monitors the coolant level and sends a signal to the engine computer or Body Control Module (BCM) when the coolant level is low. If the coolant level drops significantly, your vehicle will warn you with a warning light on the instrument panel and possibly illuminate the engine temperature gauge as well.

Over time, the cooling system can develop leaks in the radiator or the engine block that reduce the coolant level. Additionally, the coolant can evaporate into the engine oil or exhaust, causing overheating. If your vehicle overheats repeatedly, it can permanently damage the engine and require expensive repairs.

During an AC refrigerant recharge, technicians inspect the entire system for signs of a leak. If a leak is found, the technician will isolate and repair the leak. Once the system has been repaired, it will be recharged with new refrigerant.

In addition to hissing or bubbling noises, another sign of low refrigerant is ice on the compressor coil or evaporator coil. It also takes longer to cool a home when the refrigerant is low, which means higher energy bills.

The first thing you should do if you suspect you are low on coolant is to purchase a bottle of automotive coolant from your local hardware store. However, this will only temporarily fix the problem, since more coolant will eventually leak out of the damaged leak. To properly fix the issue, your technician will isolate and repair the leak and then refill the system with a new coolant that is free of contaminants that can damage the system in the future. The technician will then perform pressure tests and a vapor lock test to ensure the new coolant is safe for the system.

Damaged Coolant Lines

When coolant leaks, it takes away the chemical refrigerant that the compressor needs to cool the air. This isn’t just a major inconvenience, but it can also cause the compressor to overwork itself and ultimately burn out. Depending on the severity of the coolant leak, it may not be possible to fix the problem without replacing the compressor.

A visible coolant leak is the most obvious sign that your air conditioner is in need of repair. Look for a puddle under the AC unit, and note any rust or corrosion around the hose or hose clamps. If you see this, it’s important to call for professional help as soon as possible. Coolant is toxic and can cause severe physical sickness, so it’s best not to handle it on your own.

Another potential cooling problem is when the evaporator coils become too cold, which can prevent the AC system from working correctly. This is typically caused by low refrigerant levels, but it can be a result of a dirty condenser or other issues that require expert service.

The coolant lines in your air conditioner are responsible for bringing coolant from the radiator to the compressor, where it is used to create conditioned air. They are usually insulated to protect the coolant from extreme temperatures, but this insulation can wear out over time. If the insulation becomes damaged or worn out, it can allow hot air to enter the system and overheat the compressor.

A leaking coolant line can also be caused by a loose or broken hose clamp or a crack in the hose itself. This is usually a clear sign that the hose has internal damage and requires replacement. A collapsed hose is another common sign of failure, which is often caused by high heat or pressure, as well as a vacuum inside the engine’s cooling system. This is when the hose reinforcement fails and can no longer maintain its shape, which restricts coolant flow and leads to overheating.

Understanding and Treating Dry Eye Syndrome: Strategies and Solutions

Dry Eye Baltimore, MD syndrome is a common condition affecting millions worldwide. It is characterized by inadequate tear production or poor tear quality. If left untreated, it can cause discomfort, irritation, and even vision problems. Fortunately, numerous treatment options are available to alleviate symptoms and improve ocular health.

Dry Eye Syndrome

Understanding Dry Eye Syndrome

Dry eye syndrome occurs when the eyes don’t produce enough tears or the tears evaporate too quickly. Tears are essential for maintaining the health of the eye’s front surface and for providing clear vision. When there is an imbalance in tear production, it can lead to a range of symptoms, including:

  • Persistent dryness
  • Grittiness or feeling like something is in the eye
  • Redness
  • Blurred vision
  • Sensitivity to light
  • Eye fatigue

Several factors can contribute to dry eye syndrome, including age, gender (women are more prone), environmental conditions, certain medications, and underlying health conditions like autoimmune diseases.

Dry eye syndrome is a prevalent ocular condition characterized by a deficiency in tear production or poor tear quality. Tears are essential for maintaining the health and lubrication of the eyes. When the tear film is disrupted, it can lead to discomfort, irritation, and visual disturbances.

Several factors contribute to the development of dry eye syndrome. Age is a significant factor, as tear production tends to decrease with age. Hormonal changes, particularly in women, can also influence tear production. Environmental factors such as dry or windy conditions, air conditioning, and prolonged screen time exacerbate symptoms. Additionally, certain medications, medical conditions like autoimmune diseases, and refractive surgeries can contribute to dry eye syndrome.

The symptoms of dry eye syndrome can vary from mild to severe and may include sensations of dryness, grittiness, burning, or itching in the eyes. Vision may become blurred, and sensitivity to light can increase. These symptoms can have a significant impact on daily activities and overall quality of life.

There are two main types of dry eye syndrome: aqueous deficient and evaporative. Aqueous deficient dry eye occurs when the lacrimal glands fail to produce enough watery component of tears, while evaporative dry eye is caused by inadequate oil secretion from the meibomian glands, leading to increased tear evaporation.

Diagnosis of dry eye syndrome typically involves a comprehensive eye examination, including evaluation of symptoms, tear production, and tear film quality. Specialized tests such as tear osmolarity measurement and imaging of the tear glands may be used to assess the severity and underlying causes of the condition.

Treatment for dry eye syndrome aims to alleviate symptoms, improve tear quality, and prevent complications. It often begins with over-the-counter artificial tear drops to lubricate the eyes. In more severe cases, prescription medications, punctal plugs to block tear drainage, or procedures like LipiFlow® to clear blocked oil glands may be recommended.

In addition to medical treatments, lifestyle modifications can play a crucial role in managing dry eye syndrome. These include using humidifiers to add moisture to the air, taking regular breaks during prolonged screen use, avoiding exposure to smoke and wind, and staying hydrated.

Regular follow-up appointments with an eye care professional are essential for monitoring the progression of dry eye syndrome and adjusting treatment as needed. With proper management, most individuals with dry eye syndrome can find relief from their symptoms and maintain good eye health.

Causes of Dry Eye Syndrome

Dry eye syndrome can arise from various factors that disrupt the delicate balance of tear production, distribution, and quality. One primary cause is age-related changes in tear production. As people age, tear production tends to decrease, leading to a higher prevalence of dry eye symptoms, especially in individuals over 50.

Hormonal fluctuations also contribute to dry eye, particularly in women. Hormonal changes during pregnancy, menopause, or while using oral contraceptives can affect tear composition and volume, making women more susceptible to dry eye syndrome.

Environmental factors play a significant role in exacerbating dry eye symptoms. Dry and windy conditions, as well as exposure to air conditioning or heating systems, can evaporate tears more quickly, leaving the eyes dry and irritated. Prolonged screen time and focusing on digital devices can also reduce blink rates, leading to incomplete spreading of tears across the ocular surface.

Certain medications are known to cause or worsen dry eye symptoms. Antihistamines, decongestants, antidepressants, and medications for high blood pressure are among the drugs that can reduce tear production or alter tear composition. Additionally, medical conditions such as autoimmune diseases (e.g., Sjögren’s syndrome, rheumatoid arthritis) and diabetes can impact tear production and quality, leading to chronic dry eye.

Refractive surgeries, such as LASIK or PRK, can also induce dry eye symptoms as they may disrupt corneal nerves and reduce tear production. While these procedures often result in improved vision, they can cause temporary or even persistent dryness in some individuals, necessitating careful preoperative evaluation and postoperative management to minimize discomfort and optimize healing.

Treatment Approaches

Treatment for dry eye syndrome aims to relieve symptoms, restore the health of the ocular surface, and prevent further complications. Here are some common approaches:

  1. Artificial Tears: Lubricating eye drops are the first line of defense for mild cases. They supplement natural tears and provide relief from dryness and irritation.
  2. Prescription Eye Drops: For moderate to severe dry eye, prescription medications may be necessary. These include eye drops that reduce inflammation or increase tear production.
  3. Punctal Plugs: These tiny plugs are inserted into the tear ducts to block drainage, helping tears remain on the surface of the eye longer.
  4. LipiFlow®: This innovative treatment addresses evaporative dry eye by applying gentle heat and pressure to the eyelids, clearing blocked oil glands and improving tear quality.
  5. Intense Pulsed Light (IPL) Therapy: IPL therapy has shown promising results in managing meibomian gland dysfunction, a common cause of evaporative dry eye. It reduces inflammation and improves gland function.
  6. Nutritional Supplements: Omega-3 fatty acids, found in fish oil supplements, may help improve tear quality and reduce inflammation.
  7. Lifestyle Changes: Simple adjustments such as using a humidifier, taking regular breaks during screen time, and avoiding smoke and wind can alleviate dry eye symptoms.
  8. Eyelid Hygiene: Regular eyelid hygiene, including warm compresses and gentle lid scrubs, can help maintain clean and healthy eyelids, reducing the risk of inflammation.

Dry eye syndrome is a chronic condition that requires ongoing management. With a combination of lifestyle changes, home remedies, and medical interventions, most people can find relief from their symptoms and prevent further complications. It’s essential to work closely with an eye care professional to determine the most effective treatment plan for each individual case. By addressing dry eye promptly and effectively, patients can enjoy improved comfort and vision quality.

Heating Up: Essential Insights into Water Heater Repairs

Most homeowners don’t give much thought to their water heater until something goes wrong. Then it becomes a source of frustration and a major inconvenience.

Water Heater Repairs

If your heater runs out of hot water or is leaking, first check the circuit breaker in the service panel to see if it has tripped. If it has, press the reset button. Then test the heating elements. However, if you professional help, contact Water Heater Repair Tampa.

A thermostat is a vital part of your home’s heating and cooling system. In fact, without a functioning thermostat you may not even realize that your home’s heating isn’t working. It’s important to understand how thermostats work so you can recognize common problems and troubleshoot them when they arise. This will help keep your home’s temperature comfortable and prevent costly repairs.

The basic function of a thermostat is to regulate the flow of energy to a device based on the device’s internal temperature and the surrounding environment. For example, a thermostat will increase the flow of electricity to your furnace when it senses that the room is getting too warm. The thermostat works by comparing the temperature of the room with the current setting of the thermostat. If the difference is greater than a certain threshold, the thermostat actuates a valve to reduce the flow of energy to the furnace. If the temperature is lower than a threshold, the thermostat reverses this action and increases the flow of energy to the furnace.

Water heater thermostats use the same basic principle as traditional thermostats. They consist of two pieces of different metals bolted together to form a strip that acts as an electrical bridge in a circuit connected to your water heater. When one of the metals gets hot, it expands more than the other, bending the strip slightly. The bridge then breaks, and the electricity shuts off.

If you’re experiencing no hot water, there could be a few reasons for this problem. You could have a tripped circuit breaker in the service panel, a tripped high-temperature limit switch or failed heating elements. First, make sure electricity is actually being delivered to the water heater. Check the circuit breaker in the service panel to see if it’s flipped off. If so, flip it back on. It will take some time for the water heater to reheat, so wait about an hour before testing your supply of hot water.

If you have a gas water heater, you should also check the pilot light. If it’s not lit, you’ll need a long lighter to reach into the access panel and start the pilot. Once you’ve done this, check other gas appliances in your home to ensure they are turned on and receiving gas.

Element

Water heaters are often out of sight, out of mind — until they break down. Without a functioning water heater, showers become cold, dishes stay dirty and laundry piles up. The effects of a burned-out heater element are far-reaching and can severely impact your family’s quality of life. That’s why it’s important to address any issues you encounter with your water heater right away.

While it’s impossible to predict when your water heater will stop working, there are a few indicators that can point you in the right direction. If your water heater produces lukewarm water, the top heating element has likely burnt out. If the water is rusty or discolored, it could also be an indication that this element has malfunctioned.

To begin, turn off the water and power to your tank. Next, disconnect the wires from the old heating element and remove it. Once you’ve removed the old heating element, it’s time to install the new one. Start by connecting the wires to the new heating element and attaching it to the mounting plate. Once you’ve finished, close the drain valve and reconnect the water supply. Turn on the water and test your new heating element to ensure it’s properly connected.

Most electric water heaters have a heating element near the bottom of the tank and another near the top. The lower heating element is responsible for maintaining a specific temperature of the water in the tank while it’s waiting to be used. The upper heating element is responsible for heating the water when it comes into the tank. When both of these elements break down, your hot water will suffer a significant reduction in quality and run out more quickly than normal. To avoid this, be sure to perform regular maintenance on your water heater by draining it twice a year and replacing the anode rod every three years. This will help prolong the lifespan of your water heater.

Dip Tube

A long plastic tube, a dip tube, is installed on your water heater to direct incoming cold water directly to the bottom of the tank where it is heated by either a gas burner or primary electric heating element. Water that enters the water heater through its top must pass by the hot water heater elements to reach your faucets and shower nozzles so it would be impossible to heat water from the bottom up without a directional flow.

Since a dip tube is submerged in water of different temperatures, acidity and mineral content it tends to wear out over time. When it does small pieces of the dip tube can end up in your hot water system. If you find small bits of dip tube in your faucet aerators, hoses or washing machine tubing it may be time to replace the old dip tube.

Fortunately, water heater dip tubes are relatively easy to replace. Before you begin you’ll want to shut off the gas and water at your heater. You’ll also need to drain the water heater tank. Once you’ve done this remove the hose from the drain valve and close the pressure relief valve on the water tank. You should also close the cold water supply line to your tank.

To remove the old dip tube, first pull up on the nipple of the connector attached to it with your hand or a wrench and turn it counterclockwise. You can then remove the old tube. Be careful, as it may be very hot. If you are replacing a metal or stainless steel dip tube, you might want to consider upgrading to one made from composite materials as these are less prone to corrosion.

Once you’ve removed the old dip tube, install the new one by attaching it to its new connector and inserting it into the inlet port on your water heater. Be sure to screw it in all the way and that the curve on the tip is pointing away from the drain valve on your water heater.

Now it’s time to reconnect the cold water line, refill your tank and restore power to your water heater. Once it’s back on, open a hot water faucet to vent air and then start the hot water flowing to check that the new dip tube is working properly.

Pressure Valve

A water heater safety valve (commonly referred to as a T&P valve) protects your water heater from excessive pressure, which can cause it to burst. This valve is found on all standard water heaters and some tankless units, and it is crucial to your home’s safety.

A T&P valve has a disc or diaphragm that lifts when system pressure exceeds its set point. A spring or other device keeps the valve closed at normal pressure levels. A screw can adjust the valve’s set pressure. A gas water heater’s T&P valve may also have an auxiliary pilot piston. If this is the case, the auxiliary pilot’s orifice can become dirty and clogged over time. This can cause the pilot light to keep going out or prevent it from lighting.

When the T&P valve malfunctions, it can allow excess pressure to build up in your water heater’s tank and leak out through the discharge pipe. This can lead to a fire that could burn your house down. This video from Bermad’s Water Heater Training Center explains what causes the T&P valve to fail, how to test it, and what to do when you discover that your safety valve is not working.

Before you start testing your water heater’s safety valve, make sure that the power is off and the water supply is shut off. Then, place a bucket underneath the discharge pipe to catch any water that flows out of the valve. If the valve opens and water flows into your bucket, it is functioning properly. If not, you will need to replace the valve. Once the new valve is installed, you will need to retest it. You should also test the low-temperature limit switch located down by the viewing door at the bottom of the water heater. This will ensure that the water heater is able to shut off before it overheats. This video from Dan Jiles demonstrates how to test this switch, and he also shows you how to reset it. After checking the temperature-pressure relief valve and the low-temperature limit switch, you should be able to get hot water flowing at your faucets again!

Hydro Jetting – Get Rid of Clogged Drains and Sewer Lines

Unlike commercial drain cleaners, which can eat away at your pipes, Hydro Jetting Los Angeles uses no chemicals. Your plumber inserts a specialized nozzle downstream into your plumbing system. This nozzle connects to a durable hose that’s capable of withstanding high psi forces.

Hydro Jetting

The powerful blast of water removes any debris that’s stuck to your pipe walls. This prevents future blockages and helps your pipes last longer.

Unlike store-bought drain cleaners that contain chemicals that can corrode your pipes, Hydro jetting does not use any harmful ingredients. Instead, it uses a jet of pressurized water to clear away the grime and blockages. The high-powered water can easily penetrate even the deepest of clogs and blast them away. This method is safe and effective for your pipes and the environment.

This powerful cleaning process can remove all types of buildup, including grease and soap scum, as well as tree roots. It is also effective for clearing out stubborn drain clogs caused by sewer backups. A clogged sewer line can lead to sewage and waste backing up into your home, creating a health hazard for you and your family. If you hear gurgling, bubbling or hissing noises coming from your plumbing system, this is a sure sign that there’s a major clog somewhere in the system. Typically, this type of clog can’t be removed with a snake or plunger, and requires the assistance of hydro jetting.

It can even clean the insides of your pipes, which will reduce their clogging potential in the future. Using hydro jetting can eliminate bacteria that accumulates on the walls of your pipes, which can cause health and odor problems. Hydro jetting is especially useful for homes with older pipes that are often the source of clogs and drainage issues.

If you have old pipes, it’s best to consult a professional plumber before considering hydro jetting. They will perform a video inspection to locate the clogs and see if your pipes can handle the pressure of the high-powered water. If they can’t, the plumber will recommend other more gentle drain cleaning solutions.

A hydro jetting service is an excellent way to keep your piping system in good condition and to prevent costly repairs or replacements down the road. It is also a great option for businesses with large drain lines that are subject to a lot of wear and tear. For more information about our hydro jetting services, contact us today! Our licensed, experienced plumbers will thoroughly inspect your pipes and advise you of the best options for addressing your clogs.

It’s Effective

Whether you are experiencing slow drains, gurgling sounds in the toilet or raw sewage backflow, you can count on hydro jetting to get your sewer lines cleaned quickly and thoroughly. The pressurized water scours the walls of your pipes, dislodging and destroying any built-up materials. It also dissolves and breaks down tree roots, which can cause serious blockages. The powerful water pressure can help extend the life of your drain and sewer lines as well.

Unlike chemical drain cleaners, Hydro jetting doesn’t use any harsh or toxic chemicals to clean your pipes. The high-pressure water can remove all types of buildup, including grease, debris, and tree roots. This leaves your pipes free of the corrosive gunk that can lead to premature breakdown and costly repairs. Hydro jetting is a green and eco-friendly alternative to chemical drain cleaners that can harm the environment.

The power of the water also makes hydro jetting ideal for old or fragile pipes. However, it may not be enough to dislodge severe obstructions caused by damaged or bellied pipes. A professional plumber should evaluate the condition of your pipes before starting any work.

Before the hydro jetting process begins, a plumber will snake a small video inspection camera down your drain line to see where the clog is located and what it is made of. This will allow the plumber to make an informed decision about how to proceed with the cleaning process. For example, if the problem is a large clump of tangled tree roots, the plumber might need to break them up first with a snake before jetting the line.

Hydro jetting is very effective in ALMOST ALL cases of clogged or blocked drains and sewer lines. If you are experiencing slow drains, gurgling in the toilet or smelly raw sewage backing up into your home, it’s time to call for a hydro jetting service.

Getting your plumbing in tip-top shape will save you money in the long run and ensure that your home is safe and comfortable. Be sure to shop around for the best rates and services available. Obtaining multiple quotes will help you compare prices, experience and included services. Bundling hydro jetting with other plumbing repairs or services can also result in a discount on your total bill.

It’s Affordable

If your drains are frequently clogged and you’ve tried snaking and plunging, it may be time for hydro jetting. This powerful cleaning technique uses high-pressure water to clean pipes and remove clogs from grease deposits, hair, soap scum, mineral build up, tree roots, and other debris. The pressurized water is so powerful, it cuts through the clog and blasts the debris out of your drain line and into the municipal sewer system.

The highly pressurized water also flushes out any bacteria growth in your pipes. This means that your pipes are cleaner and won’t re-clog for years. The use of this method eliminates the need for chemical solutions and is safe for your family and pets. HB Home Service Team can provide this service for your home or business.

Hydro jetting is an affordable option to consider if you have frequent clogged pipes or have a serious clog that just won’t go away with snakes and plungers. Because it is so effective, it may be worth the initial investment to avoid costly damage to your pipes down the road.

Using hydro jetting, a plumber can reach even the hardest-to-reach spots in your home’s plumbing system, such as inside your walls. This method is much more flexible than traditional methods of unclogging pipes, which require cutting into the drywall and exposing the insides.

A professional plumber can also evaluate your piping system to ensure that it is in good condition before proceeding with hydro jetting. This is important because the high-pressure water can be damaging to older, brittle pipes and could cause leaks or breaks.

If you’re tired of dealing with clogged drains, give us a call at HB Home Service Team. Our plumbing experts have the skills and equipment to perform a thorough inspection and hydro jetting of your entire plumbing system to prevent future problems. Contact us today to schedule an appointment. We’re your local plumbing company that offers a wide range of services to help keep your home and family healthy, clean, and safe. We’ll work hard to get your plumbing back on track and make sure that it stays that way.

It’s Eco-Friendly

Unlike snaking or chemicals, Hydro Jetting leaves your pipes completely clean. The blast of pressurized water breaks up sludge and leaves the pipe’s inner surface free of residue, which can cause clogs in the future. While the process takes longer than snaking or chemical treatments, it leaves your pipes healthier and better able to handle regular use.

The process is also eco-friendly because it uses only water. While some people may think the large amount of water used can be a waste, it’s actually less damaging to the environment than other techniques. The only other ingredient used is soap to wash away the debris that’s washed down the drains. And, since no toxic substances are used, this technique is perfectly safe for households that connect to a public sewer system.

A hydro jetting machine typically shoots a jet of water from 2,000 to 4,000 psi. The plumber will adjust the pressure as needed to prevent damage to your pipes and to ensure that the clog is fully removed. If there are tree roots causing the problem, for example, the plumber can set the pressure higher to break them up and blast them out of the pipe.

Frequent clogs are a sign of a serious problem in your sewage line, and they can cause unpleasant odors, health issues, and raw sewage backup in your home. If you’re experiencing recurring problems, call a plumber to perform a video inspection of your sewage lines to find the source and address the issue.

For homeowners who are concerned about the environmental impact of traditional clog removal methods, Hydro jetting is an eco-friendly solution that provides long-term results. It can help you avoid costly repairs and cut down on your water bills by making it easier for water and waste to flow freely through your plumbing system. The high-powered water jets can clear accumulated grease, hair, soap scum, mineral deposits, soil, and tree roots from your pipes. It can even help you avoid the infamous London “fatberg” by breaking up the buildup of fatty food scraps and fats.

The Benefits of Hiring a Tree Service

Trees provide shade and aesthetic appeal to homes and enhance property values. But if they become severely diseased or die, they can pose serious safety risks to people and properties.

Emergency Tree Service should offer a variety of services to suit your specific needs. Inquire about their rates and how they calculate them. Also, check whether they are insured and have a business website.

Trees are a significant part of our beautiful Texas landscape. But they also require care to maintain their beauty and health. A professional tree service is essential in this process. It provides a variety of benefits, including safety measures, time savings, and tailored solutions.

A reputable tree service is licensed and insured. This means that the company follows strict safety protocols and is prepared for any possible problems during the job. They are also knowledgeable about the different types of trees and their needs. This allows them to develop a customized tree maintenance plan for each client. This ensures that your trees are healthy and well-maintained, enhancing the beauty of your property.

When choosing a tree service, price is always a factor, but it shouldn’t be the only factor. Opting for the cheapest option could lead to subpar work and costly repairs down the road. You should also make sure that the company has the necessary experience and the equipment to do the job properly.

It is crucial to find a tree service that understands the local climate and botanical challenges. They can identify specific issues such as soil conditions, tree diseases, and pests that are common in your area. In addition, they can recommend the best watering schedule and amount for your tree species.

Proper pruning is a vital aspect of tree maintenance. Incorrect pruning techniques can damage the structure of a tree and make it more susceptible to disease and pests. A qualified arborist will know the correct pruning methods for each type of tree. They will also ensure that the pruning is done at the appropriate time of year to promote growth and prevent disease.

In cities like Fort Worth and Prosper, many people incorporate trees into their landscape design. They are used to enhance outdoor recreation spaces, provide shade, and create natural windbreaks or sound barriers. A professional tree service can help you integrate your trees into your landscaping and make them a part of your home’s unique architecture.

Whether you need to trim a few branches or remove an entire tree, hiring a professional is the best way to ensure that it is done correctly and safely. Inexperienced homeowners may end up hurting themselves or damaging their property during the process. Professionals are trained to climb, use heavy equipment, and handle large limbs and trees without harming themselves or others.

Reputation

When choosing a tree service company, look for one that specializes in residential work. This allows them to avoid local ordinances that may apply to large commercial projects. Also, they tend to focus on smaller jobs like pruning and trimming.

This is a great way to keep your trees healthy and prevent them from becoming overgrown. In addition, it helps protect the integrity of your property’s foundation and sidewalks. It’s also important to choose a company that has the right tools and equipment for the job. This can ensure that the job is done quickly and correctly.

You should also consider whether the company is licensed and insured. Some communities have safe tree ordinances that require companies to have a permit. It’s also a good idea to ask about workers’ compensation and general liability insurance. This will help you protect yourself from being held liable in the event of an accident or injury on your property.

A reliable tree service can help you keep your yard looking its best and reduce the risk of damage during storms. Their services include removing dead and diseased trees, clearing limbs from roofs and gutters, and addressing issues related to poorly-placed and damaged trees. In addition, they can perform stump grinding to reclaim spaces for new plants or prevent trip-and-fall accidents.

The company’s team of highly skilled professionals has the experience to handle various types of landscaping tasks. They are familiar with the needs of different types of trees and can help you make the best decisions for your property. They will also provide recommendations on the proper maintenance of your trees and shrubs.

A reputable tree service should not perform any work that is against industry standards. For example, they should never use climbing spikes or other dangerous techniques that could injure the tree. In addition, they should be able to perform a thorough inspection of the tree before beginning work. They should also be able to identify pest infestations and diseases that affect the health of your tree. In addition, they should be a member of a recognized industry organization.

Insurance

If you are considering hiring a tree service, then you should ensure that the company has insurance coverage. This will provide you with peace of mind that in case something goes wrong, you are not liable. Additionally, this will cover any damage caused to property or personal injury of people on the job site. There are many types of insurance coverage that a tree service can have. The most important type is general liability. This covers any bodily injuries of anyone on the job site, including employees, subcontractors, clients and visitors. This type of coverage will pay for medical costs and legal fees up to a certain limit.

Another type of insurance coverage that a tree service should have is commercial umbrella or excess liability. This coverage will extend the limits of the general liability policy in the event that a lawsuit is filed against the business. A tree service should also have workers’ compensation insurance. This will cover the medical expenses and part of any lost wages if an employee is injured on the job.

Property damage coverage is a very important type of insurance coverage for tree services to have. This will cover any damages caused by the company’s equipment or work, such as a branch falling on a house or a car. Tree service companies often have expensive equipment, so it is important that they protect their assets with this type of coverage.

Lastly, a tree service should have auto liability insurance to cover any damage caused by their vehicles. This is a requirement in most states for businesses that have employees or use their own vehicles for work.

Insurance is an important aspect of any business. It can help protect against the unexpected and provide financial security for you and your customers. To get the right insurance coverage for your tree service, you should consult with a reputable insurance agency. They will be able to assess your unique risks and recommend the right policies for you. They will also be able to help you save money by bundling your policies together.

Safety

Tree trimming is dangerous work, and accidents can occur if proper safety measures are not taken. The safety measures include providing the right personal protective equipment, establishing a clear system of communication and creating a safe working environment. Tree service workers have been injured and killed in falls, electrocutions, being hit by falling trees or branches, and being struck by falling debris.

A comprehensive and well-thought-out safety plan is an essential step in the process of hiring a tree trimming company. It includes conducting a daily on-site inspection and identifying risks, developing an emergency plan, and using the right safety gear. The equipment includes hard hats, sturdy non-slip boots, gloves, and climbing gear. The gear is insulated to reduce electrical risks. Eye protection, face shields for chainsaw operation, and hearing protection are also necessary.

The equipment must be in good condition and fit the worker. It is important to have a qualified trained person on the job (QTW) and follow safety protocols. In addition, the work site must be carefully inspected to check for hazards before beginning work, including broken or loose limbs and electrical lines. It is also important to avoid climbing or aerial access when the worksite is wet, icy, or snow-covered, and to not use a ladder if it is not secured to a stable anchor point.

It is essential to have a clear and understood method of communicating with the arborist in the tree, as well as the crew on the ground. This can be done with hand signals, headsets, or walkie-talkies. It is also important to follow minimum working distances from power lines and to keep a clearance of at least two tree lengths. In addition, the QTW should check if a power line is energized before starting work, and should contact the local utility to have it de-energized or covered with insulating blankets and hoses. Finally, the tree service should have a drop zone marked and kept clear of pedestrians or property. This will prevent injuries and damage from falling debris. This can be accomplished by placing cones on the ground.

Navigation